Alamofire를 이용하여 API 호출하기
Alamofire 라이브러리란?
Alamofire은 IOS에서 많이 사용하는 Swift 기반의 HTTP 네트워크 통신 라이브러리이다.
Alamofire 라이브러리 사용법
- Pods 폴더의 Podfile에
pod ‘Alamofire’, ‘~> 버전’을 기입해주고 shell에서pod install을 실행한다. - 네트워크 통신을 사용할 Controller.swift 파일에
import Alamofire를 해주고 clean, build 해준다.
ObjectMapper 라이브러리란?
ObjectMapper를 사용하면 JSON 응답을 모델 객체로 변환하거나 그 반대로 변환 할 수 있다. 주로 JSON을 객체에 매핑시킬 때 사용한다. 또한 ObjectMapper를 사용할 때 JSON 응답 데이터를 Swift 객체로 변환하는 AlamofireObjectMapper라는 Alamofire 확장 기능이 있다.
ObjectMapper 라이브러리 사용법
-
Pods 폴더의 Podfile에
pod ‘ObjectMapper’ , ‘~> 버전'과pod ‘AlamofireObjectMapper’, ‘~> 버전’을 기입해주고 shell에서pod install을 실행한다. -
네트워크 통신을 사용할 Controller.swift 파일에
import ObjectMapper와import AlamofireObjectMapper를 해주고 clean, build 해준다.
AlamofireObjectMapper 라이브러리란?
ObjectMapper를 사용하여 자동으로 JSON response data를 swift 객체로 변환시켜주는 Alamofire 라이브러리의 확장 라이브러리이다
AlamofireObjectMapper 안에 Alamofire와 ObjectMapper가 포함되어 있으므로 취향에 따라 AlamofireObjectMapper 하나만 사용해도 된다.
간단한 예제 코드
Alamofire와 ObjectMapper를 적용해 보기 위해 다음과 같은 어플을 만들어 보았다.
- JSONPlaceholder에서 HTTP 네트워크 통신으로 userId, id, title, body로 구성되어 있는 JSON을 받아온다.
- title을 테이블 뷰에 적용하고, 셀(title)을 터치하면 해당 셀의 구체적 내용(body)을 네비게이션 바를 이용하여 새 화면에서 보여준다.
- 새 화면으로 넘어갈 때는 외부 라이브러리를 사용하여 로딩 바를 보여준다.
- Model, Controller, Cell (Custom한 Cell) 의 폴더에 나누어 구현하였다.
JSONPlaceholder : Fake Online REST API for Testing and Prototyping GET POST DELETE PUT PATCH같은 HTTP 메서드를 사용하는 API를 REST API라고 한다.
Post.swift (Model)
// foundation에는 기본적인 Int, Double, Float같은 자료형이나 print 같은 메서드가 들어가 있다. UIKit에는 foundation이 포함되어 있다.
import Foundation
import ObjectMapper

// ObjectMapper 안의 프로토콜 Mappable 타입으로 class 생성
class Post: Mappable {
	var userId: Int = 0
	var id: Int = 0
	var title: String = ""
	var body: String = ""

	required init?(map: Map) {
	}
	// JSON의 데이터값들이 내가 만든 멤버변수로 매핑됨
	func mapping {
		userId <- map["userId"]
		id <- map["id"]
		title <- map["title"]
		body <- map["body"]
	}
}
ViewController.swift (Controller)
class ViewController: UIViewController {
	@IBOutlet var postTableView: UITableView!
	//  Post.swift(Model)에서 만든 Post 타입 리스트 변수를 선언
	var posts: [Post] = []

	func loadPosts() {
		Alamofire.request("https://jsonplaceholder.typicode.com/posts")
	.responseArray { (response: DataResponse<[Post]>) in
		// 만든 멤버변수 post에 받아온 데이터 newPost를 넣어주고 넣은 값을 반영시키기 위해 postTableView를 reload한다.
		if let newPosts = response.result.value {
			self.posts = newPosts
			self.postTableView.reloadData()
		}
	}

	// 아래의 postTableView 프로토콜 메소드 구현 과정에서 performSegue가 실행되면 prepare 메소드가 실행된다.
	override func prepare (for segue: UIStoryboardSegue, sender: Any?) {
		// 보통 이렇게 switch문으로 segue를 구별
		switch segue.identifier {
			// "DetailSegue"일 경우에 그 segue의 목적지 (연결되는 곳,  즉 DetailViewController)을 변수로 선언하고 강제 형변환 해준다.
			case "DetailSegue"?:
				let detailViewControler = segue.destination as! DetailViewController
				// 아래 postTableView의 performSegue 메소드에서 보낸 sender(즉 데이터의 post.id)를 detailViewController의 postId에 대입하고 강제 형변환 해준다.
				detailViewController.postId = sender as! Int
			default:
				print("Error")
		}
	}
}

// UITableView Protocol 메소드들 구현
extension ViewController: UITableViewDelegate, UITableViewDataSource {
	func numberOfSections(in tableView: UITableView) -> Int {
		return 1
	}

    func tableView(_ tableView: UITableView, numberOfRowsInSection section: Int) -> Int {
        return self.posts.count
    }

    func tableView(_ tableView: UITableView, cellForRowAt indexPath: IndexPath) -> UITableViewCell {
            //
        let postCell = tableView.dequeueReusableCell(withIdentifier: "PostCell") as! PostCell
        postCell.titleLabel.text = self.posts[indexPath.row].title
        return postCell
    }

        // Cell을 터치했을 때(선택했을 때) identifier 이름이 "DetailSegue"인 Segue를 실행시킨다. post.id를 보낸다.
    func tableView(_ tableView: UITableView, didSelectRowAt indexPath: IndexPath) {
        let post = self.posts[indexPath.row]
        self.performSegue(withIdentifier: "DetailSegue", sender: post.id)
    }
}
DetailViewController.swift (Controller)
import UIKit
import Alamofire
import AlamofireObjectMapper
import NVActivityIndicatorView

class DetailViewController: UIViewController {
    @IBOutlet var postTextView: UITextView!

    var postId: Int!
    var loadingView: NVActivityIndicatorView!

    override func viewDidLoad() {
        super.viewDidLoad()
        // loading 바를 외부 라이브러리를 통해 구현
        self.loadingView = NVActivityIndicatorView(
            frame: CGRect(
                origin: CGPoint(x: view.center.x - 50, y: view.center.y - 50),
                size: CGSize(width: 100, height: 100)
            ),
            type: .ballPulseSync,
            color: UIColor.black,
            padding: 0
        )
        self.view.addSubview(self.loadingView)

        loadPost()
  }
	// Post로 받은 데이터를 뷰에 그려주는 함수
    // 처음 ViewController에서 네트워크 통신 Alamofire.request("https://jsonplaceholder.typicode.com/posts")했을 경우에는 body가 없는데
    // DetailViewController에서 Alamofire.request("https://jsonplaceholder.typicode.com/posts/\(id)")에는 body가 있을 경우를 가정하여 한번 더 호출
	func loadPost() {
		Alamofire.request("https://jsonplaceholder.typicede.com/	posts/\(id)")
		// Post로 DataResponse의 데이터를 받아와서 response 변수에 넣어줌
		.responseObject { (response: DataResponse<Post>) in
			// response 데이터의 값 받아오기
			if let post = response.result.value {
				// postTextView에 post로 받아온 데이터의 body값을 넣어줌
				self.postTextView.text = post.body
	}
}
Main.storyboard
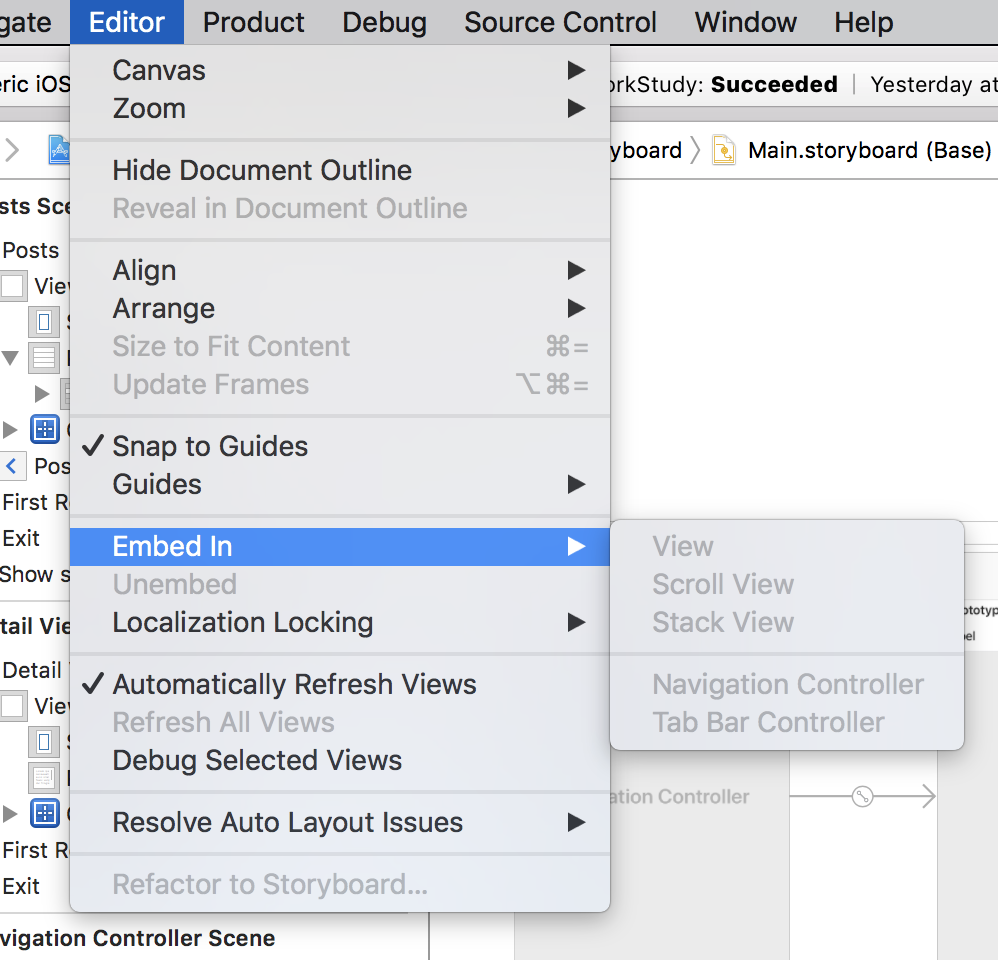
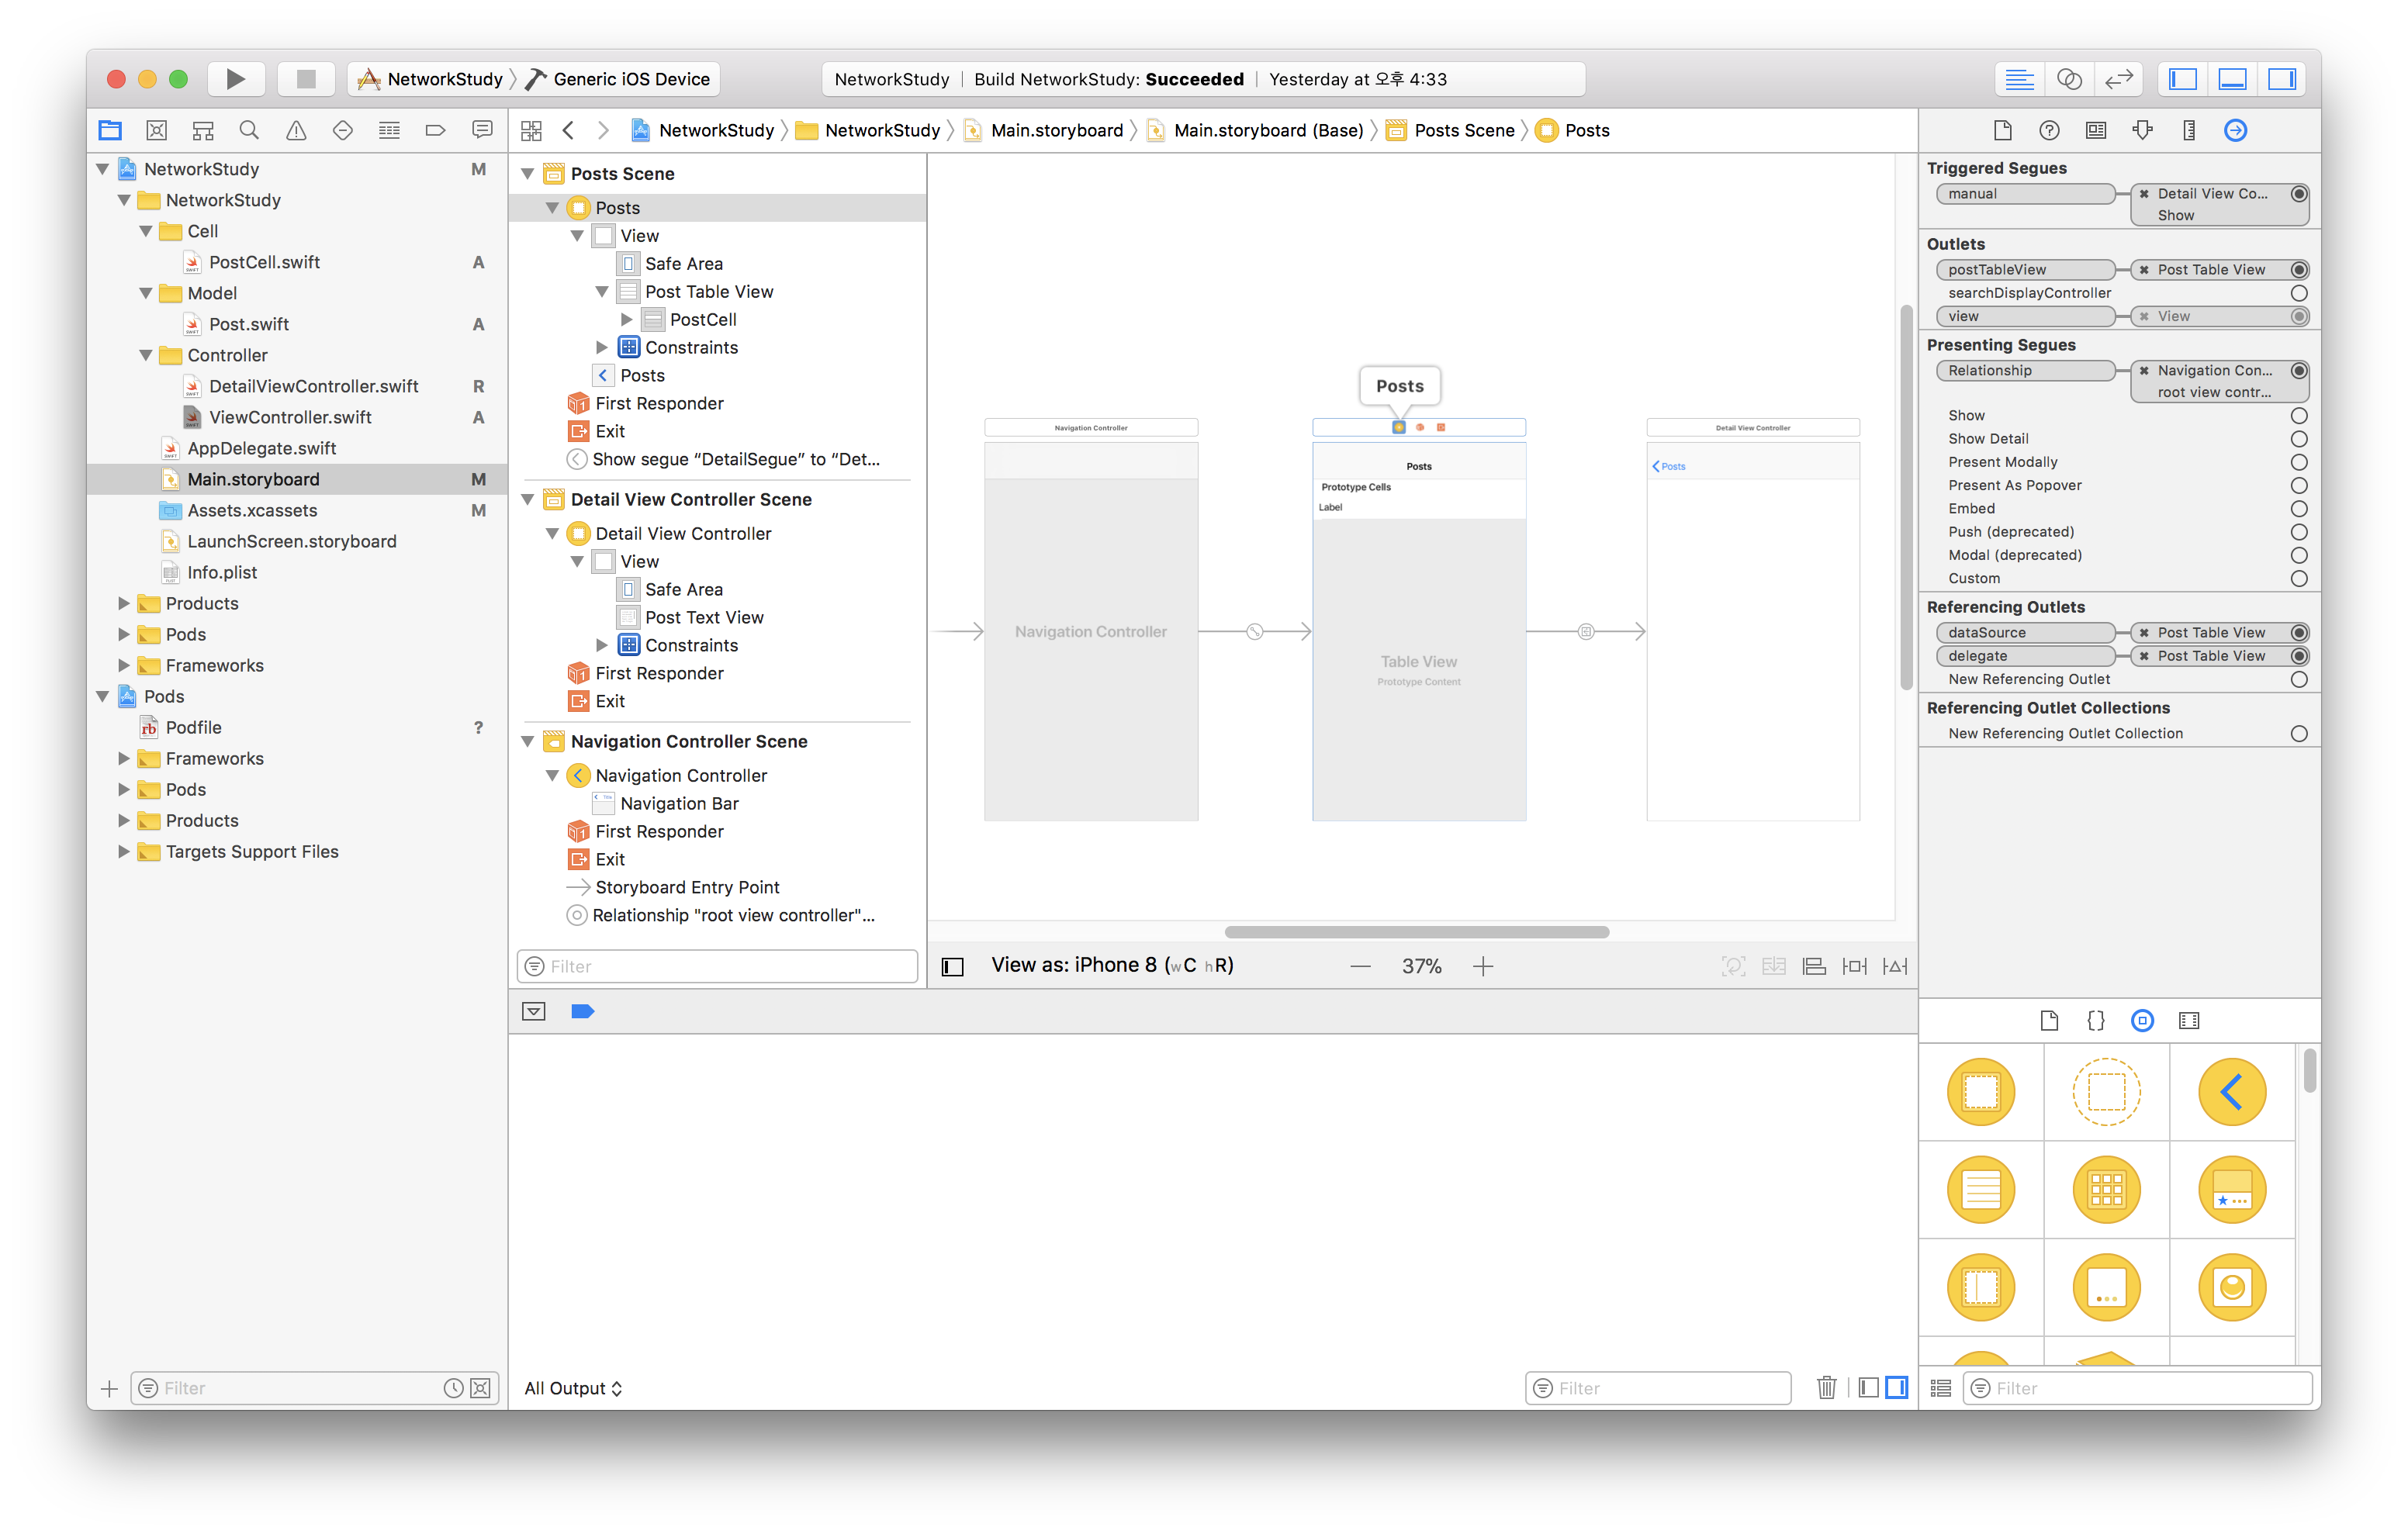
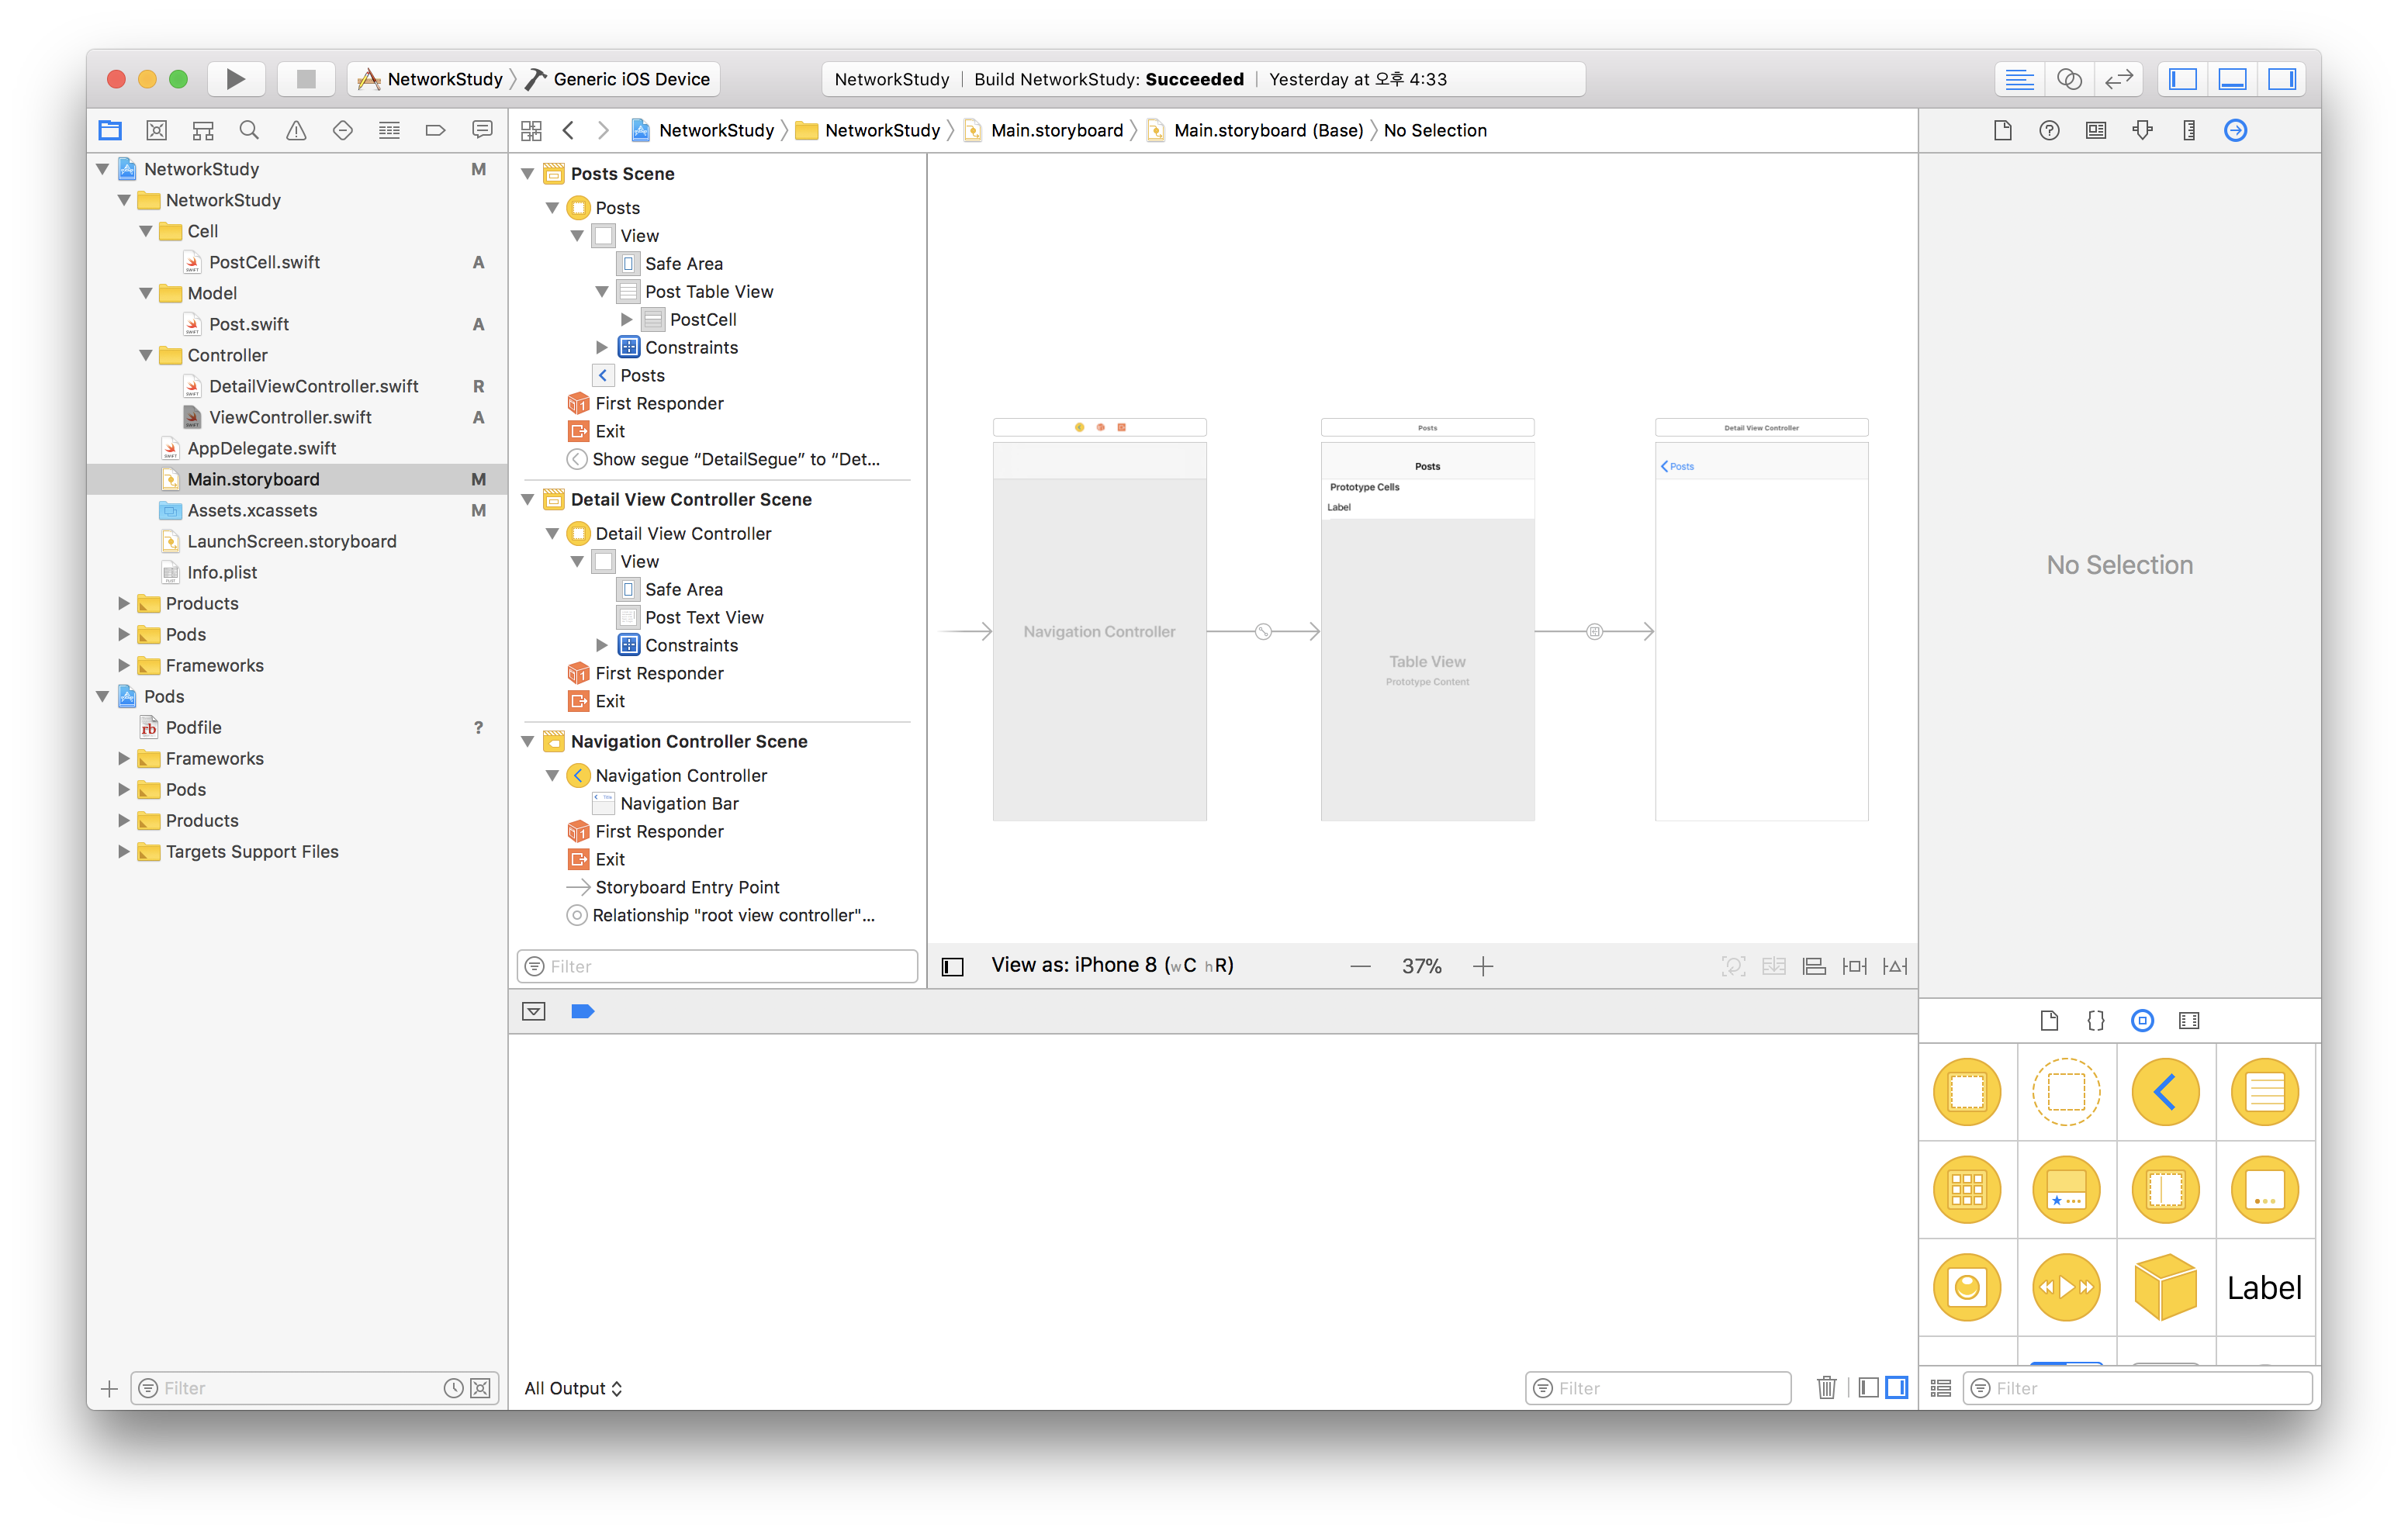
 Navigation Controller를 넣어서 ViewController와 DetailViewController를 연결해준다.
 control키를 누른 상태에서 ViewController를 DetailViewController에 연결시키고 show로 해준다,
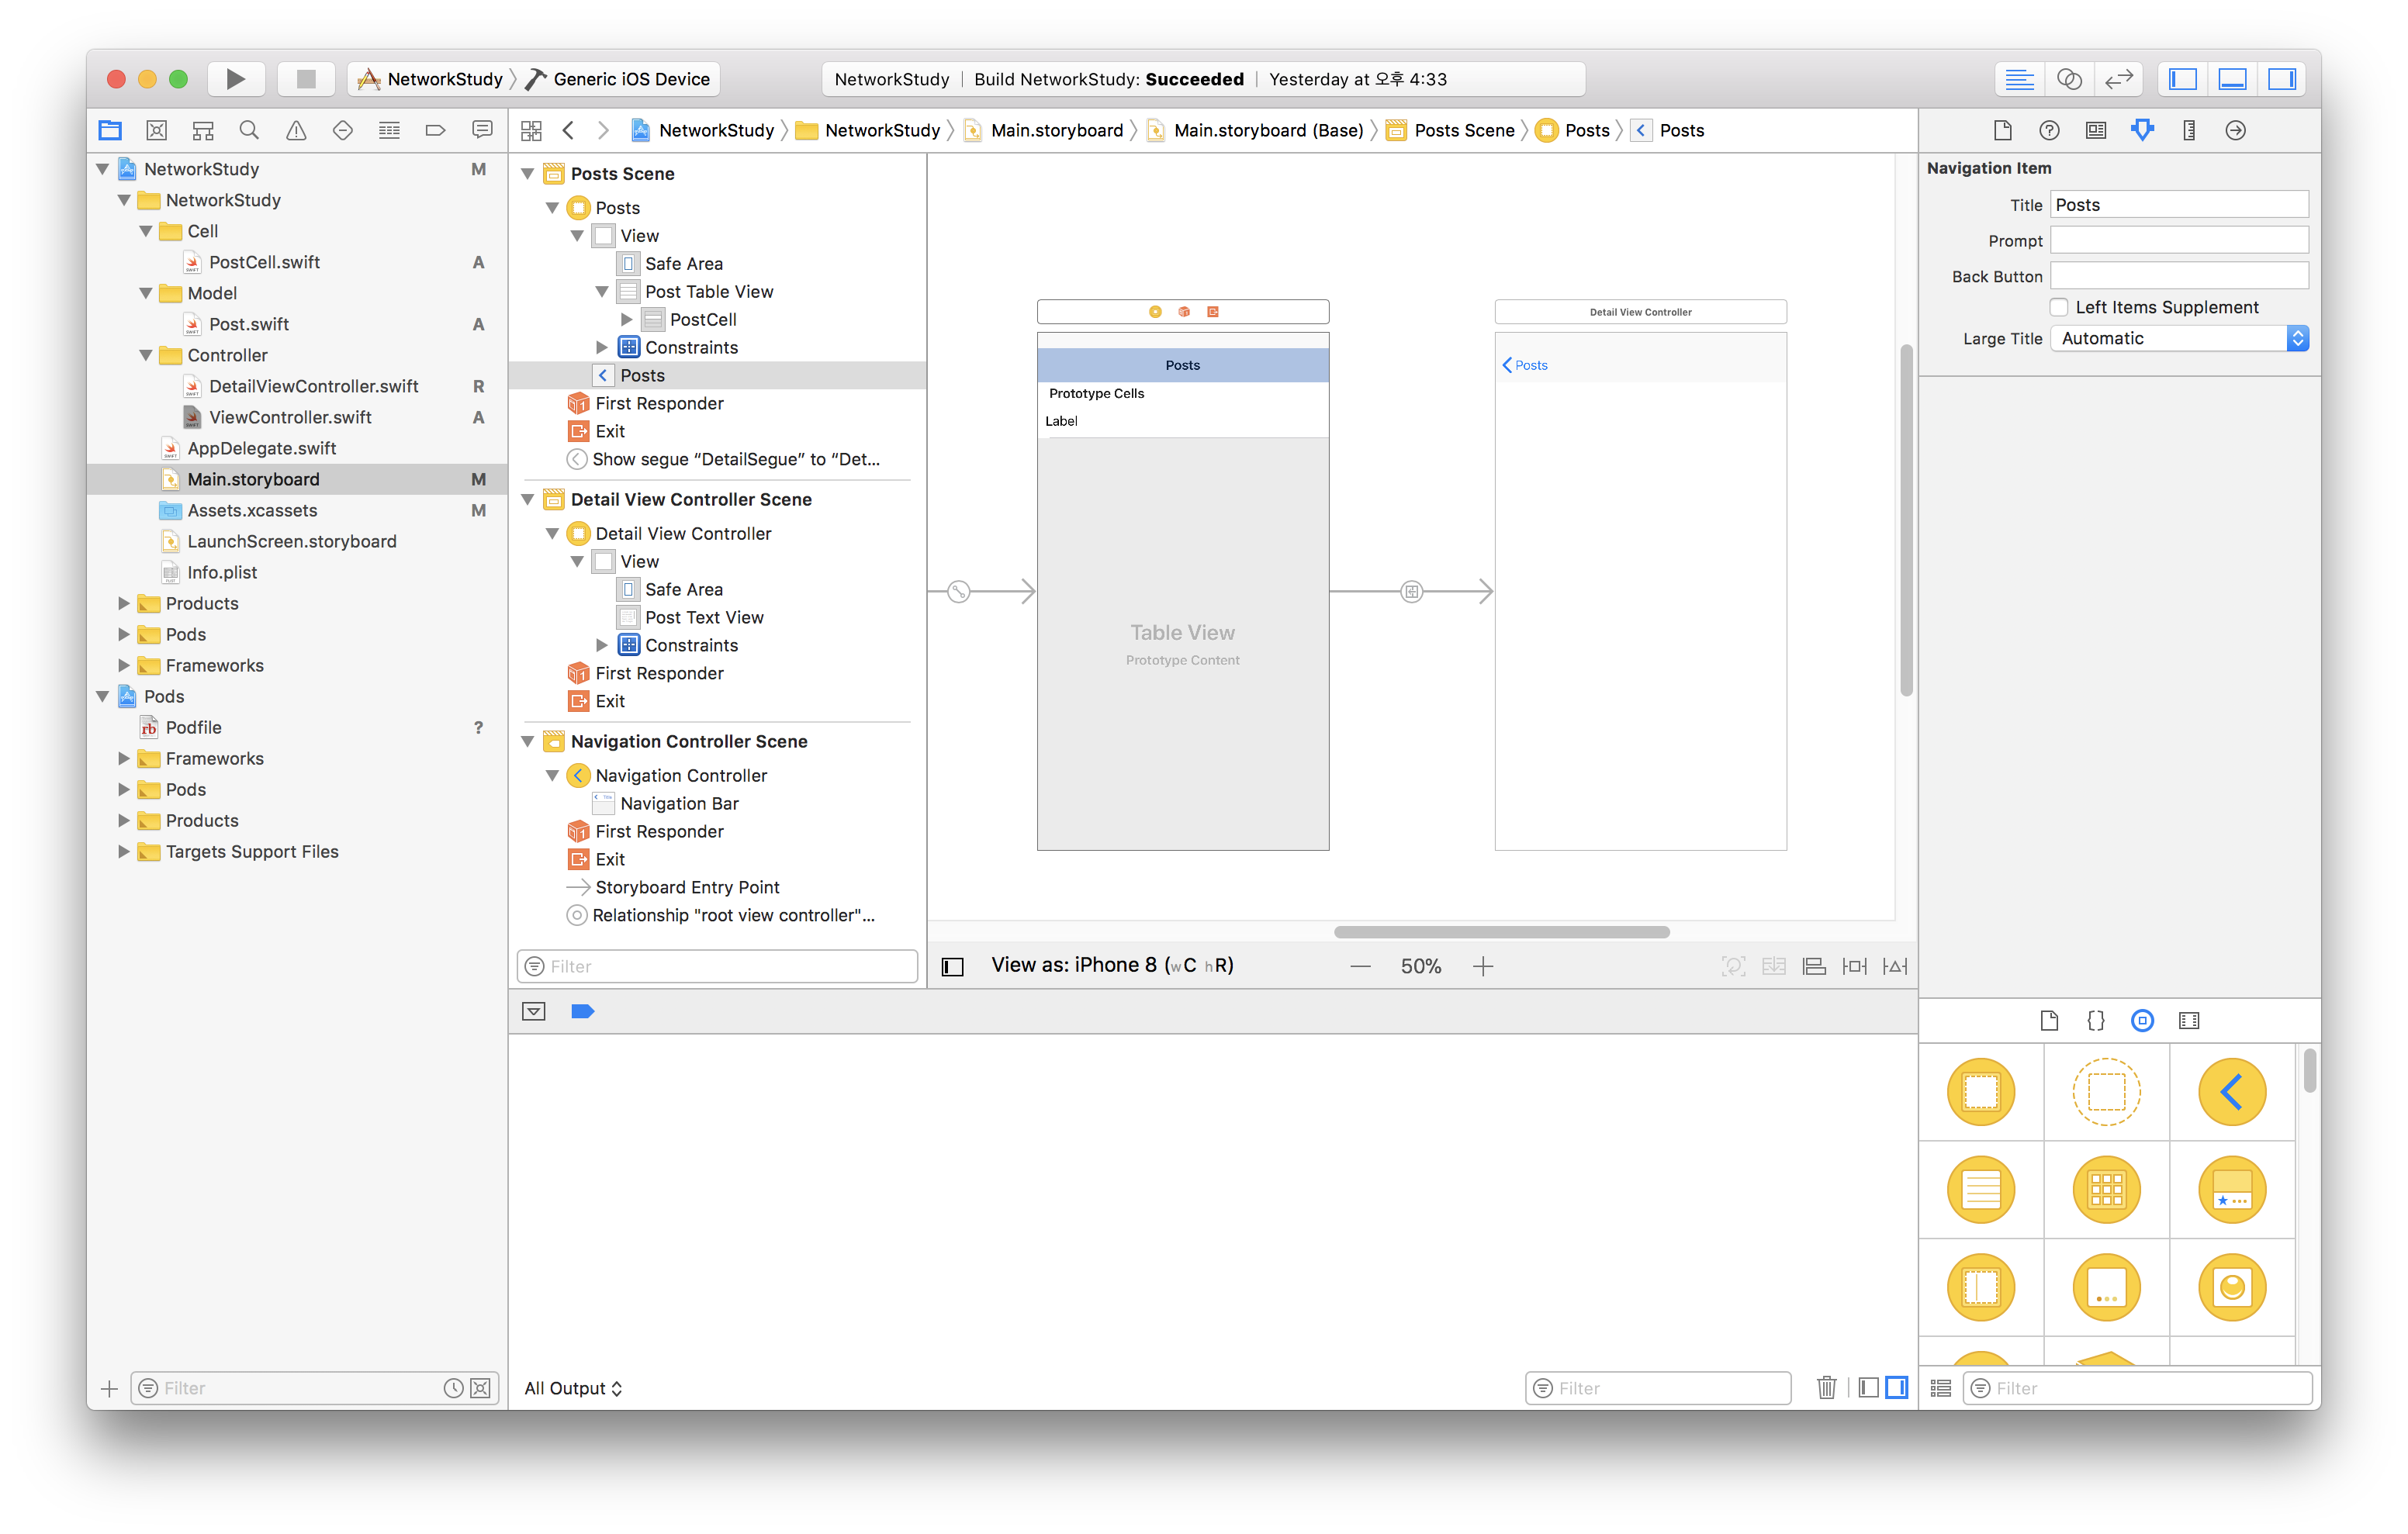
 Navigation bar 이름을 Post로 해준다.

